Weekly Coding Challenge
Every week, we pick a real-life project to build your portfolio and get ready for a job. All projects are built with ChatGPT as co-pilot!
Start the ChallengePodcast: Code Sets You Free
A tech-culture podcast where you learn to fight the enemies that blocks your way to become a successful professional in tech.
Listen the podcastWhat is HTML? It's time to learn HTML and its structure
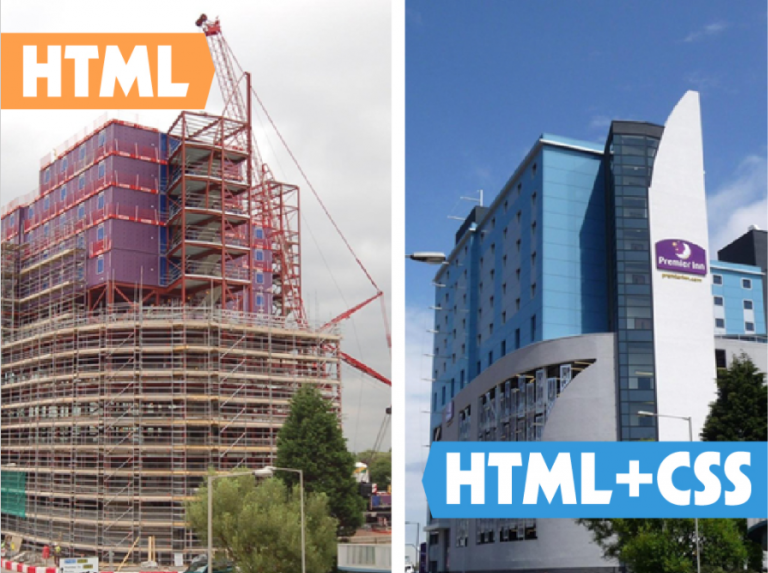
☝️ Since in the previous chapter we equated houses, stores and buildings to web pages; then we could say HTML is the blueprints.
HTML is the Website Skeleton
All web pages have HTML. It’s the structure of EVERYTHING. Think of it as the columns at a construction site.
HTML allows you to divide the website information into parts (similar to the basic parts of a document): header, title, content, footnote, subtitle, etc. Then, with CSS you can make your page beautiful, and, with JavaScript, make it interactive.
Originally, browsers only knew how to interpret HTML. Websites were simple and neither CSS nor JavaScript were used. A website was a simple plain-text document with the typical elements any Word Document has: headings, bullet-point lists, paragraphs, etc.
HTML Syntax: It’s All <Tags>.
Remember when we said the Internet is all text?
In that sense, HTML is a language that uses <tags> to represent the elements that a web page must have. A tag is just a word that begins with < > and ends with </ >.
All tags must open and close (closing tags always precede the element with a /).
There are 2 different types of tags:
-
Container tags: when there is content between both tags, you should close it with (
</tag>). For example, to markup a section of text as a paragraph, you open the tag with (<p>) and close it at the end with (</p>). -
Non-container tags: they are standalone tags without closing tags (
</ >). For example, the tag for a line break is (<br>).
Attributes
Once a <tag> is defined, we can describe in detail its behavior by assigning attributes to the <tag>. For example, if we want our HTML document/page to have a link to another page, we use the <a> tag, and we assign to it an attribute called href, which allows us to specify the URL of the page we want to link.
1<a href="google.com">Click here and it will take you to Google.com</a>
In theory, you have to use one of these tags. Don’t make up your own tags because the browser won’t know how to interpret them. You must learn HTML's tags meanings, and their functionality, in order to put them to good use… But don’t worry, there aren’t that many! 🙂
For the main heading of the document, the tag we use is <h1>. For example: An online store has an "Electronics" category. The title to that category would be "Electronics" and the <h1> tag would be written as follows:
1 <h1>Electronics</h1>
Nested Tags
Finally, tags can contain one or more tags within them. For example, if we want to give an italic style to the word "electronics" we would wrap the word with the tag <i>:
1 <h1><i>Electronics</i></h1>
Blank Spaces and Line Jumps
Empty (or blank) spaces and line breaks are ignored by the browser when rendering the text. If we write five blank spaces in a row, or just one, the browser will interpret it the same way. If we want a line break, we must use the <br> tag. If we want more "space", we need to insert for each whitespace (yes, we know it’s weird, but it is what it is).
The following three alternatives will look the same (spaces and jumps of line will be ignored):
1<tag>Hello</tag><tag>World</tag>
Line jumps are ignored:
1<tag>Hello</tag>
2<tag>World</tag>
Spaces are ignored:
1<tag>Hello</tag> <tag>World</tag>
Page Structure
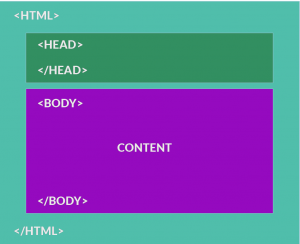
All pages must begin with the <!DOCTYPE html> statement followed by <html>, then the <head> and the <body> tags. These tags must contain other tags within them (nested tags), and they will split the page in 2 main parts: the HEAD and the BODY:
1<!-- We must always begin with an HTML label to show the browser that this is a document with an HTML format. -->
2<!DOCTYPE html>
3<html>
4   <head>
5   <!-- Inside the head tag we will define all the information the browser needs in order to start interpreting the page. -->
6   </head>
7   <body>
8   <!-- Inside the body we will define the content of the page. -->
9   </body>
10</html>
Let's simulate how a browser thinks: Imagine a user on his browser (client-side) who types the URL: 4Geeks.com
-
The server will open the default HTML file on that server, which will probably be: index.html.
-
Then, it will read its content and interpret it as HTML (because the extension of the file is index.html).
-
The user will not see the text content of the file, instead they will see a visual interpretation of that text.
As you can see, all pages will include, AT LEAST, the following tags:
| Name | Tags | Description |
|---|---|---|
| HTML | <html> | We must begin by letting the browser know that this is an HTML document. We can also specify the HTML version we are using. |
| Head | <head> | Everything that is inside of the HEAD won’t be seen by the user. It’s the part of the page where the developer specifies information about the website, such as: the language being used, what the website is about, the fonts used, the icon that the browser tab will have (favicon), and many other important things. |
| Body | <body> | Here you will place all the content that will be viewed by the end-user. If this were MS Word, the body would mark the beginning of your page content (the first line of your document). |
The <HEAD> is like the Envelope of a Letter.
We read the envelope of a letter to find information about the letter, but not of its content. Here you can find who wrote the letter, in what language it is written, where it is from, etc.
In the case of HTML, the <head> can contain the following tags (among other less important ones):
| Name | Tag | Description |
|---|---|---|
| Title | <title> | The title appears in the browser’s window, and it’s also used when you share the page through social media: Twitter, Instagram, Facebook, etc. All these networks use the title of the page as a summary when a user copies the URL of your page to share on their wall. |
| Meta | <meta> | Meta tags describe documents. They are used to specify things like: the author, title, date, keywords, descriptions, etc. Search engines love these tags because they allow an easier comprehension of the content before it is read. |
| Link | <link> | Used for linking the page with the CSS style sheets. In the CSS chapter you will learn how to create style sheets and you will be able to import them using the Link tag. |
| Style | <style> | If we can’t or don’t want to import a CSS style sheet, we may also define styles directly on the HTML document inside the Style tag. This is a practice we rarely recommend and should only be used when you don’t have any other choice. |
| Script | <script> | Used to add JavaScript code to the page. All JavaScript code must be contained in these tags. They can also be used in the BODY, if desired. The difference is that any JavaScript code that we place in a <script> tag in the BODY won’t be available when the page begins to run (that’s exactly why the HEAD is so useful). |
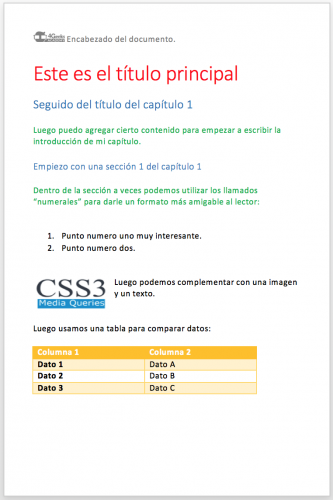
The <body> is Similar to any MS Word Document
Ok, now that we are familiar with the general and necessary structure of the page, let's review the tags we can and must use to define the content of the page.
Remember – for the fifteenth time – that a web page is… a text document! If you knew the answer before you read it you are getting it! And, if not, don’t worry. We’ve never known of anyone learning HTML and CSS rather quickly ;).
Let's see how a website compares to a Word document:
The most frequent tags used inside the <body> of an HTML document are:
| Name | Tags | Description |
|---|---|---|
| Heading | <h1>, <h2>, ..., <h6> | They define the headings and subheadings of the page (the heading is not the same as the title; the title is used by the browser and it’s defined with the title tag).<h1>This is a heading</h1> |
| Paragraph | <p> | This tag separates the text content with an upper and lower margin. In this way it helps simulate the behavior of a Word paragraph.<p>example of a paragraph</p> |
| List | <ul>, <ol> | Lists are of huge importance in a document and they are widely used. With HTML we have two main tags to list content items:<ol><li>Element 1</li><li>Element 2</li></ol> |
| Image | <img> | It allows us to add images to the document (they could be PNG, JPEG, GIF and SVG formats, basically).<img src="url of the image"/> |
| Link (Anchor) | <a> | Sometimes we want to connect one or more pages with another one, or send the user to a new page, or even send the user to another section within the same page (just like the Menu of this course). That’s what the anchor tag is made for.<a href="url to resend">text to be clicked</a> |
| Bold | <strong> or <b> | To highlight content using bold text.<strong>this text is bold</strong> |
| Italics | <i> | To have the text in italics.<i>this text is in italics</i> |
| Line jump | <br> | To jump or skip the text to the next line (similar to a shift+enter in MS Word.)<br> |
| Tables | <table> | Tables were designed to present data in a more read-friendly and neat way. It has headers (th), rows (tr) and cells (td).<table><tr><th>Column 1</th><th>Column 2</th></tr><tr><td>Data 1</td><td>Data A</td></tr><tr><td>Data 2</td><td>Data B</td></tr><tr><td>Data 3</td><td>Data C</td></tr></table> |
🔗 Click here, for more HTML tags
The Attributes (Properties)
We already know each <tag>'s behavior. Thanks to tags we can change the font size – as is the case with headings –, add margins between paragraphs, list elements, etc.
If you wish to further specify how you want the behavior of a specific tag to be, you can use its attributes. To use them, you must define the attributes in the opening tag, like this:
1<img src="http://www.mydomain.com/myimage.png" />
In this case, we are assigning the "src" property to the <img> tag which will indicate the path or URL of the image to be displayed in this container.
Each tag has its own properties (you do not have to memorize them, you will always find them quickly over the Internet), but it is good that you know the most important ones so that you have them ready in your mind at any time.
That’s why we have created a series of exercises that will better explain each of the important properties of the most used HTML elements.
👏👏👏 You are one step closer to learning HTML!
We are so PROUD! 🙂
You just learned how a website was built in 1999. Now we only have a few more weeks to catch up on everything else that happened in the last 20 years. Now you can say that you know how to make a website!
HTML has a lot more tags. There's also a new version called HTML5. But again, don’t worry, you’ll learn HTML and how to build beautiful (thanks to CSS) and interactive (thanks to forms and JavaScript) websites in the next few lessons. That’s why we are here!!